5. CLI (Command Line Interface)
Contenuti
5.1. Introduzione
5.1.1. Lanciare la CLI
La CLI viene lanciata con il comando :
{{SANET_INSTALL_DIR}}/bin/sanet-cli
o in alternativa:
sanet-manage sanetcli
5.1.2. CLI con autenticazione
E' possibile configurare Sanet per richiedere o meno l'accesso alla CLI tramite credenziali di accesso (vedi: Utenti ).
5.1.2.1. Cli senza autenticazione
Quando l'autenticazione non e' attiva, qualunque operazione viene eseguita come se fosse eseguita da utenti admin.
Tutte le entita' create vengono create con owner nullo (e quindi saranno visisbili di default solo agli utenti admin).
5.1.2.2. Cli con autenticazione
Per abilitare questa modalita' bisogna inserire nel file di configurazione di Sanet il seguente parametro:
CLI_AUTHENTICATED = True
Quando questa modalita' e' attivata' la CLI richiede credenziali di autenticazione al momento dell'esecuzione.
Per specificare le credenziali a riga di comando bisogna lanciare la CLI con i seguenti parametri:
sanet-cli [ -U <username> ] [ -P <password> ]
Se l'username non viene specificato, Sanet verifica che esista nel database interno una utenza con lo stesso username dell'utente che e' loggato nella shell. Se l'username non esiste da errore.
Important
per ragioni di sicurezza, solo alcuni utenti di sistema possono lanciare la CLI specificando uno username (-U) diverso dal loro username di shell. Gli utenti autorizzati a questa modalita' sono configurabili modificando il parametro CLI_SHELL_ROOT_USERS nel file di configuraziond di Sanet. Il default e':
CLI_SHELL_ROOT_USERS = [
        "root"
]
Se la password non e' specificata, viene chiesta tramite un prompt protetto.
Note
La password richiesta dipende dal sistema di autenticazione scelto (Si rimanda alla sezione Configurazione autenticazione per dettagli.)
Quanto l'autenticazione e' attivata qualunque operazione viene eseguita come se fosse eseguita dall'utente indicato.
Tutte le entita' create vengono create con owner corrispondente all'utente in uso (e quindi saranno visisbili di default solo dall'utente in uso o dagli utenti admin).
5.2. Funzionalita' di base
5.2.1. Completamento
La CLI supporta l'autocompletamento dei comandi utilizzando il tasto TAB.
Usando il carattere "?" e' possibile scoprire se il comando corrente accetta opzioni/parametri aggiuntivi oltre a quelli gia' inseriti
show templates ?

 node               Show node templates
 interface          Show interface templates
 storage            Show storage templates
 service            Show service templates
 device             Show device templates
 datagroup          Show datagroup templates
 used
 |                  Pipe output through filter
 <CR>
5.2.2. Commenti
Tutte le righe inserite da standard input che iniziano con '#' sono considerate commenti e vengono ignorate.
5.2.3. Filtrare l'ouptput
L'output prodotto dai comandi della cli puo essere filtrato/processato da diversi comandi utilizzando la seguente sintassi:
<comando cli> <parametri> | <comando di filtro> <parametri>
I comandi di filtro sono:
begin   <regexp>   Display only output after a line matching a regex
count              Display only the number of lines in output
display <options>  Display additional information
end     <regexp>   Display only output before and excluding a line matching a regex
exclude <regexp>   Display only output not matching a regex
last    <n>        Display only a number of lines at the end of output
include <regexp>   Display only output matching a regex
match   <regexp>   Display only output matching a regex
grep    <regexp>   Display only output matching a regex
tail    <n>        Display only a number of lines at the end of output (same as last)
5.3. Comandi di base
Esiste un set base di comandi sempre disponibile.
5.3.1. Help
Mostra tutti i comandi disponibili (e le varie alternative) in un dato punto della CLI:
help
5.3.2. History
Mostra tutti i comandi inseriti dall'utente.
history
La history viene salvata nel file $HOME/.sanet-cli-history
5.3.3. Alterare la configurazione interna della CLI
E' possibile modificare alcuni comportamenti/configurazione interne della CLI usando il comando:
set ...
5.3.3.1. Gestione del terminale
5.3.3.1.1. terminal width
Imposta il numero di colonne massimo utilizzato dall CLI per formattare su standard output del terminale i dati di monitoraggio:
set terminale width <num>
5.3.3.1.2. Exit words
Imposta come comando di uscita una delle parole indicate.
set terminal exitwords [<word1>[,<word2>...]]
Esempio:
root@localhost# sanet-cliset terminal exitwords stop,ESCI exit exit exit ESCIroot@localhost#
5.3.3.1.3. Formattazione tabelle in CSV
Alcuni comandi (es: show) mostrano dati in formato tabellare che puo' essere formattato nelle seguenti modalita':
tabella "ascii" (default)
CSV
JSON
La modalita' e' selezionabile a riga di comando:
sanet-cli -F (normal|csv|json)
Da dentro la CLI e' si puo' cambiare modalita' di formattazione con il comando set terminal:
set terminal format normal

set terminal format csv <carattere di separazione>

set terminal format json
Esempio:
sanet-clishow usersID USERNAME FIRST_LAST EMAIL ACTIVE SUPER LASTLOGIN -- -------- ---------- ----- ------ ----- -------------------------- 26 utente2 True False 2014-10-06 18:39:07.063314 29 utente0 True False 2014-10-07 12:04:27.841400 30 prova True True 2014-10-07 12:25:14.592152 20 admin True True 2014-10-07 18:03:11.636888 28 utente3 True False 2014-10-06 15:45:32.045743 25 utente1 Utente 1 True False 2014-10-06 17:46:12.160071set terminal format csv show users26#utente2# ##True#False#2014-10-06 18:39:07.063314 29#utente0# ##True#False#2014-10-07 12:04:27.841400 30#prova# ##True#True#2014-10-07 12:25:14.592152 20#admin# ##True#True#2014-10-07 18:03:11.636888 28#utente3# ##True#False#2014-10-06 15:45:32.045743 25#utente1#Utente 1 ##True#False#2014-10-06 17:46:12.160071set terminal format csv # show users26,utente2, ,,True,False,2014-10-06 18:39:07.063314 29,utente0, ,,True,False,2014-10-07 12:04:27.841400 30,prova, ,,True,True,2014-10-07 12:25:14.592152 20,admin, ,,True,True,2014-10-07 18:03:11.636888 28,utente3, ,,True,False,2014-10-06 15:45:32.045743 25,utente1,Utente 1 ,,True,False,2014-10-06 17:46:12.160071
5.3.3.1.4. Formattazione tabelle in JSON
La formattazione in formato JSON esporta dei dizionari le cui chiavi sono le colonne della tabella:
set terminal format json
Esempio:
# echo -e "show node" | sanet-cli -F json | cat
[
{
"name": "fileserver",
"agent": "remote-agent",
"community": "public",
"timeout": 1,
"icon": "",
"s": "",
"r": "",
"cluster": null,
"p.": 0,
"owner": "",
"template": "",
"effective ip": "1.1.0.15",
"description": ""
},
{
...
...
L'output puo' essere porcessato usando comandi per manipolare dati codificati in formato JSON (es: jq):
# echo -e "show node" | sanet-cli -F json | jq '.[]| .name+" "+.agent' -r
fileserver remote-agent
nodo1 main-agent
nodo2 main-agent
nodo3 agent2
prova2 main-agent
5.3.3.1.5. Abilitare colori
Abilitare la colorazione della sintassi:
set terminal colors yes|no
Note
se la CLI viene eseguita e lo standard output viene rediretto su un file, la colorazione viene automaticamente disabilitata.
E' possibile abilitare la colorazione in fase di esecuzione della CLI:
sanetcli --colors
5.3.4. Impostare del tenant corrente
In ogni istante la CLI mostra i dati di monitoraggio sempre di un tenant alla volta, definito "tenant corrente".
E' possibile "saltare" da un tenant all'altro attraverso l'apposito comando:
set tenant <tenant name>
5.3.5. Filtri sull'output dei comandi
Quando permesso e' possibile applicare dei filtri i comandi aggiungendo al termine di un comando l'operatore pipe "|" e specificando il tipo di filtro da applicare.
begin              Display only output after a line matching a regex
count              Display only the number of lines in output
display            Display additional information
end                Display only output before and excluding a line matching a regex
exclude            Display only output not matching a regex
last               Display only a number of lines at the end of output
include            Display only output matching a regex
match              Display only output matching a regex (same as include)
tail               Display only a number of lines at the end of output (same as last)
5.4. Consultazione (show)
Elenco parziale dei possibili dati visualizzabili tramite il comando "show".
5.4.1. Tenants
show tenant                                                        Show defined Tenants
show tenant <TENANT>                                               tenant name

show timegraph                                                     Show timegraphs
show timegraph device <MONITOREDNODE> <MONITOREDDEVICE>            Show device's timegraphs
show timegraph interface <MONITOREDNODE> <MONITOREDIFACE>          Show interface's timegraphs
show timegraph node <MONITOREDNODE>                                Show node's timegraphs
show timegraph path <datagroup path>                               Show timegraph
show timegraph service <MONITOREDNODE> <MONITOREDSERVICE>          Show service's timegraphs
show timegraph storage <MONITOREDNODE> <MONITOREDSTORAGE>          Show storage's timegraphs

show timegraphserie                                                Show timegraph series
5.4.2. Utenti e gruppi
show user                                                          Show defined Users
show user <USER>                                                   username
show group                                                         Show defined Groups
show group <GROUP>                                                 username
5.4.3. Xform
show xform-device                                                  Show device xform
show xform-device <XFORM>                                          Show selected device xform
show xform-interface                                               Show interface xform
show xform-interface <XFORM>                                       Show selected interface xform
show xform-service                                                 Show service xform
show xform-service <XFORM>                                         Show selected service xform
show xform-storage                                                 Show storage xform
show xform-storage <XFORM>                                         Show selected storage xform
5.4.4. Agenti
show agent                                                         Show define agents
show agent <TENANT>                                                Show selected agent
show agent <TENANT> info                                           Show agent running internal data
5.4.5. Livelli di priorita
show priority-levels Show priority levels range
5.4.6. Datagroup
show datagroup                                                     Show configured datagroups
show datagroup device <MONITOREDNODE> <MONITOREDDEVICE>            Show device's datagroups
show datagroup interface <MONITOREDNODE> <MONITOREDIFACE>          Show interface's datagroups
show datagroup node <MONITOREDNODE>                                Show node's datagroups
show datagroup path <datagroup path>                               Show datagroup
show datagroup service <MONITOREDNODE> <MONITOREDSERVICE>          Show service's datagroups
show datagroup storage <MONITOREDNODE> <MONITOREDSTORAGE>          Show storage's datagroups

show datasource                                                    Show configured datasources
show datasource device <MONITOREDNODE> <MONITOREDDEVICE>           Show device's datasources
show datasource interface <MONITOREDNODE> <MONITOREDIFACE>         Show interface's datasources
show datasource node <MONITOREDNODE>                               Show node's datasources
show datasource path <datagroup path>                              Show configured datasource
show datasource service <MONITOREDNODE> <MONITOREDSERVICE>         Show service's datasources
show datasource storage <MONITOREDNODE> <MONITOREDSTORAGE>         Show storage's datasources

show condition                                                     Show conditions
show condition device <MONITOREDNODE> <MONITOREDDEVICE>            Show device's conditions
show condition interface <MONITOREDNODE> <MONITOREDIFACE>          Show interface's conditions
show condition node <MONITOREDNODE>                                Show node's conditions
show condition path <datagroup path>                               Show condition
show condition service <MONITOREDNODE> <MONITOREDSERVICE>          Show service's conditions
show condition storage <MONITOREDNODE> <MONITOREDSTORAGE>          Show storage's conditions
show condition filter <LINE>

show info                                                          Show global informations
5.4.6.1. Show "filter" commands
Syntax:
show condition filter <option>=<value> [ <option>=<value> [ ... ] ]
Options:
Option
Values
node
STRING
interface
STRING
storage
STRING
service
STRING
device
STRING
template
STRING
agent
STRING
status
up|down|suspended|uncheckable
title
STRING
Example:
show condition filter node=localhost status=up
show condition filter status=up title=foo
5.4.7. Cluster
show cluster                                                       Show clusters
show cluster <CLUSTER>                                             Show selected cluster
5.4.8. Elementi
show node                                                          Show nodes
show node <MONITOREDNODE>                                          Show selected node

show storage                                                       Show storages
show storage node <MONITOREDNODE>                                  Show storages for the given node
show storage node <MONITOREDNODE> <MONITOREDSTORAGE>               Show storage informations for the given node

show interface                                                     Show interfaces
show interface node <MONITOREDNODE>                                Show interfaces for the given node
show interface node <MONITOREDNODE> <MONITOREDIFACE>               Show the selected interface for the given node

show service                                                       Show services
show service node <MONITOREDNODE>                                  Show interfaces for the given node
show service node <MONITOREDNODE> <MONITOREDSERVICE>               Show interface informations

show device                                                        Show devices
show device node <MONITOREDNODE>                                   Show devices for the give node
show device node <MONITOREDNODE> <MONITOREDDEVICE>                 Show device informations
5.4.9. Log
show log Show log
5.4.10. Log Reason
show log-reason Show log reasons
5.4.11. note
show notes Show notes
5.4.12. Tag
show tag info <tree> <tag path>                                    Show tag's informations
show tag info <tree> <tag path> summary                            Show tag's element type counters
show diff tag <node1> <node2>                                      Show differences between tags in specified nodes
show tagtree                                                       Show defined tag trees
show tagtree <tree>                                                Show tag tree informations
5.4.13. Link
show link Show links
5.4.14. Templates
5.4.14.1. Datagroups
show templates datagroup                                           Show datagroup templates
show templates datagroup <datagroup template>                      Show datagroup template informations
5.4.14.2. Elements
show templates                                                     Show configuration templates
show templates node                                                Show node templates
show templates node <element template>                             Show node template informations

show templates interface                                           Show interface templates
show templates interface <element template>                        Show interface template informations

show templates storage                                             Show storage templates
show templates storage <element template>                          Show storage template informations

show templates device                                              Show device templates
show templates device <element template>                           Show device template informations

show templates service                                             Show service templates
show templates service <element template>                          Show service template informations
5.4.15. Configurazione
La configurazione e' consultabile attraverso i comandi
show conf ...
Questo e' l'elenco dei comandi
show configuration                                                 Show configuration

show configuration this                                            Show configuration for the current element

show configuration agent                                           Show agent settings
show configuration agent <TENANT>                                  Show agent settings

show configuration cluster                                         Show cluster configuration
show configuration cluster <CLUSTER>                               Show cluster configuration

show configuration datagroup-template                              Show datagroup template configuration
show configuration datagroup-template <datagroup template>         Show datagroup template configuration
show configuration datagroup-template <datagroup template> library Show datagroup template configuration from library

show configuration device-template                                 show node-template configuration
show configuration device-template <element template>              show node-template configuration

show configuration group                                           Show group configuration
show configuration group <WORD>                                    Show group configuration

show configuration interface-template                              show node-template configuration
show configuration interface-template <element template>           show node-template configuration

show configuration links                                           Show configured links

show configuration node                                            Show node configuration
show configuration node <MONITOREDNODE>                            Show node configuration
show configuration node-template                                   show node-template configuration
show configuration node-template <element template>                show node-template configuration

show configuration service-template                                show node-template configuration
show configuration service-template <element template>             show node-template configuration

show configuration storage-template                                show node-template configuration
show configuration storage-template <element template>             show node-template configuration

show configuration tagtree                                         show tag tree configuration
show configuration tagtree <tree>                                  show tag tree configuration

show configuration tenant                                          Show tenant configuration
show configuration tenant <TENANT>                                 Show tenant configuration

show configuration user                                            Show user configuration
show configuration user <USER>                                     Show user configuration
5.4.15.1. Output multi-riga per alcuni campi
La configurazione dei datagroup-template consente di specificare stringhe multi-riga per alcuni campi.
Di default le configurazion idi sanet sono mostrate su righe singole e viene fatto l'escaping dei caratteri di andata a capo.
Esempio:
show conf datagroup-template prova

datagroup-template prova
    source site
    datasource ds1
        expr "1+1\n"
    exit
    condition check
        expr "1.3.6.1.2.1.1.1.0@\n+ 3 + 4\n"
    exit
exit
E' possibile modificare questo comportamento attraverso il comando:
set configuration output field <tipo> multiline yes|no
I tipi di campi supportati sono
expr: mostra output multiriga per tutte le expr (di datasource e condition)
msg-bodies: mostra output multiriga per tutti i campi msg-*
Esempio:
set configuration output field expr multiline yes

show conf datagroup-template prova

datagroup-template prova
    source site
    datasource ds1
        expr-multiline
1+1
.
    exit
    condition check
        expr-multiline
1.3.6.1.2.1.1.1.0@
+ 3 + 4
.

    exit
exit
5.4.16. Ricerca full text
E' possibile effettuare ricerche fulltext sugli elementi di monitoraggio e condition:
show search fulltext <LINE> Full-text search
Note
La logica della ricerca e' la stessa usata per le ricerche full text effettuate da interfaccia web. Vedi Ricerca.
5.4.17. Verbosita' della configurazione
I comandi "show configuration" mostrano una configurazione in formato testuale.
E' possibile impostare la CLI per mostrare oltre ai comandi effettivi anche altre informazioni (commenti o comandi "commentati") per aiutare nella comprensione/modifica delle configurazioni esistenti.
Il comando per aumentare la "verbosita" della configurazione e':
set configuration output verbosity (full|normal)
Oppure intervenire nel file di configurazione di Sanet (conf/settings.py) e impostare
CLI_CONFIGURATION_VERBOSE_LEVEL = 10 # full
Esempio:
show conf node foo
node foo
    agent main-agent
    template server-linux
exit

set configuration output verbosity full

show conf node foo
node foo
    agent main-agent
    #
    # Templates assigned directly
    #
    template server-linux
    #description Taken from library
    #
    # Datagroup from templates
    #
    #template-datagroup icmp-reachability from server-linux
    #exit
exit
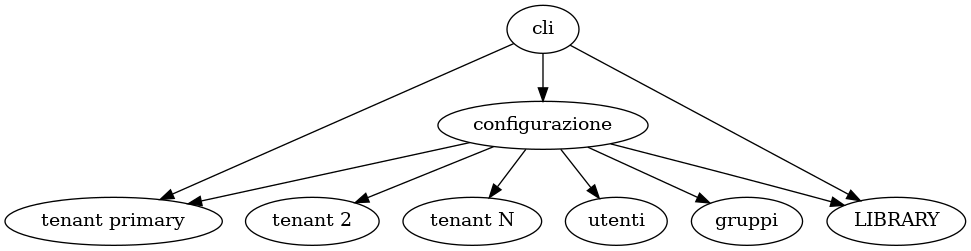
5.5. Configurazione
La modalita' di configurazione permette di aggiungere/rimuovere/modificare i dati di monitoraggio.
Il comando per entrare in questa modalita' e':
configuration
In questa modalita' e' possibile entrare in numerose sotto-modalita':
configurazione library
configurazione utenti
configurazione gruppi
configurazione tenant
5.5.1. Stringhe e regole di quoting
Qualunque stringa che prevede caratteri di spaziatura deve essere racchiusa tra doppi apici (").
IMPORTANTE: le regole di quoting della CLI non sono le stesse usate da shell piu' avanzate come BASH o simili.
In fase di lettura da standard input la CLI in alcuni casi aiuta l'utente permettendo l'inserimento di stringhe con spazi senza obbligare l'uso di doppi apici.
Esempio: La seguente stringa inserita
title Questo e' un titolo con spazi
viene in realta' convertita in:
title "Questo e' un titolo con spazi"
Se si racchiude una parola (senza caratteri di spaziatura) tra doppi apici ("), la CLI riumove i doppi apici perche' inutili.
Esempio:
title questo e' un "bel" mondo
Divenata:
title "questo e' un bel mondo"
Se si voglio usare i doppi apici (") all'interno di stringhe bisogna usare l'escape "".
Esempio:
title "questo e' un "bel" mondo"      SBAGLIATO

title "questo e' un \"bel\" mondo"    GIUSTO
Risultato:
title "questo e' un \"bel\" mondo" -> questo e' un "bel" mondo
5.5.1.1. Quoting della CLI e quoting di stringhe nelle expr
Le regole di quoting della CLI (uso dei doppi apici) sono indipendenti dalla regole di quoting del linguaggio delle espressioni di sanet.
IMPORTANTE: Quando si inseriscono delle espressioni che usano literal di stringhe bisogna tenere presente che ci sono due livelli di quoting da gestire per essere sicuri di scrivere espressioni sintatticamente correte.
Per dettagli si rimanda al paragrafo sulla sintassi delle stringhe nel linguaggio di Sanet Strings.
Esempio: Ipotizziamo di avere la seguente espressione da scrivere in una condition:
strlen("hello") == 4
Usando la CLI bisogna inserire il comando:
expr "strlen(\"hello\") == 4"
Poiche' il linguaggio delle expr di Sanet accetta come delimitatore di stringhe sia gli apici singoli (') che gli apici doppi ("), e' possibile usare gli apici singoli (') per rendere piu' leggibile l'espressione visibile via CLI e rispettare contemporaneamente sia le regole di quoting della CLI che del linguaggio delle expr.
Queste due expr sono equivalienti per sanet.
strlen('hello') == 4
strlen("hello") == 4
Da CLi diventa quindi si puo' scrivere indifferentemente:
expr "strlen(\"hello\") == 4"
expr "strlen('hello') == 4"      <---- MOLTO PIU' LEGGIBILE
CONSIGLIO: usare sempre gli apici singoli (') quando e' possibile.
5.5.2. Configurazione Tenant
5.5.2.1. Creazione
Per definire un nuovo tenant:
tenant <name>
    ...
    ...
    ...
exit
IMPORTANTE: non e' attualmente possibile rinominare un tenant una volta creato.
5.5.2.2. Cancellazione
Per cancellare un tenant:
no tenant <name> <name>
IMPORTANTE: Per ragioni di prudenza, anche se il tenant viene rimosso, i suoi dati non vengono cancellati dal sistema ma solo resi non accessibili. Il namespace all'interno del database non viene cancellato. La sub-directory dati nella directory {{VAR}} non viene cancellata.
5.5.2.3. Tenant primario
Impostare un tenant come tenant primario:
tenant <name>
    primary
exit
IMPORTANTE: Il tenant precedentemente configurato come primario viene sostitutito con quello nuovo. E' consigliabile effettuare questa operazione quando il sistema e' fermo.
5.5.2.4. Dati del tenant
Impostare i dati del tenant:
tenant <name>
    ...
    long-name Tenant principale
    timezone  Europe/Rome
    ...
exit
5.5.2.5. Shortcut da CLI
E' possibile entrare immediatamente in configurazione sul tenant primario con il comando:
$ sanet-cli
conf tenant
5.5.2.6. Shortcut da Shell
E' possibile entrare direttamente in modalita' configurazione sul tenant primario da shell col comando:
$ sanet-cli -c -T
Per entrare in configurazione sul tenant idetificato col nome <name>:
$ sanet-cli -c -t <name>
5.5.3. Utenti
Per definire un nuovo utente si usa il comando:
user <username>
    ...
exit
Esempio di configurazione di un utente:
user admin
    superuser
    email pippo
    firstname Nome
    lastname Cognome
    secret pbkdf2_sha256$10000$XI1kEGLxcQtD$PHKzj2kKnba1/rmultLooE/fsEulaP+P9Jwh85/4+I8=
exit
5.5.3.3. Abilitare/Disabilitare
Abilitare:
user admin
    enable
exit
Disabilitare:
user admin
    disable
exit
5.5.3.4. Personalizzazioni sul tenant
Per impostare delle personalizzazioni sui tenant visibili dall'utente:
user admin
        tenant site
                ...
        exit
exit
5.5.3.4.1. Impostare il tenant di default
Per impostare il tenant di default di un utente bisogna utilizzare il comando default.
user admin
        tenant site
                default
        exit
exit
5.5.4. Gruppi
5.5.4.3. Aggiungere/Rimuovere utenti ad un gruppo
Aggiunta:
group foo
    user admin
exit
Rimozione:
group foo
    no user admin
exit
5.5.4.4. Personalizzazioni sul tenant
Per impostare delle personalizzazioni sui tenant dipendenti dal gruppo:
group foo
    ...
    tenant site
        ...
    exit

    tenant site2
        ...
    exit
exit
5.5.4.5. Capabilities in un tenant
Aggiungere:
group foo
    ...
    tenant site
        capability  <codice>
    exit
exit
Togliere:
group foo
    ...
    tenant site
        no capability  <codice>
    exit
exit
5.5.5. Xform
5.5.5.1. Creazione
Creare espressioni xform per le interfacce:
xform-interface <name>
    expr <alias>
    description <description>
    alias <secondary_alias>
    alias <secondary_alias_2>
exit
Creare espressioni xform per gli storage:
xform-storage <name>
    expr <alias>
    description <description>
    alias <secondary_alias>
    alias <secondary_alias_2>
exit
Creare espressioni xform per i processi:
xform-service <name>
    expr <alias>
    description <description>
    alias <secondary_alias>
    alias <secondary_alias_2>
exit
Creare espressioni xform per i device:
xform-device <name>
    expr <alias>
    description <description>
    alias <secondary_alias>
    alias <secondary_alias_2>
exit
5.5.5.2. Cancellare un xform
Cancellare un xform esistente:
no xform-interface <NAME> <NAME>
no xform-storage   <NAME> <NAME>
no xform-service   <NAME> <NAME>
no xform-device    <NAME> <NAME>
5.5.5.3. Cancellare un alias secondario di un xform
Cancellare un alias secondario xform esistente:
xform-interface <name>
    no alias <secondary_alias>
exit

xform-storage <name>
    no alias <secondary_alias>
exit

xform-service <name>
    no alias <secondary_alias>
exit

xform-device <name>
    no alias <secondary_alias>
exit
5.5.6. Configurazione Agenti
La definizione di agenti di monitoraggio avviene con il comando "agent":
agent <name>
    ...
exit
Esempio:
agent main-agent
    description ""
    primary
    threads 1
exit
Note
L'alterazione della configurazione non influenza gli agenti gia' in esecuzione quindi per rendere effettive eventuali variazioni bisogna ravviare eventuali agenti locali / remoti.
5.5.6.2. Configurare un agente come locale/remoto
Locale:
agent agent1
    locale
exit
Remoto:
agent agent1
    remote
exit
5.5.6.3. Abilitare/disabilitare un agente
Abilitare:
agent agent1
    enable
exit
Disabilitare:
agent agent1
    disable
exit
5.5.6.4. Modificare il numero di thread di monitoraggio
Comando:
agent agent1
    threads  <numero>
exit
Esempio:
agent agent1
    threads 25
exit
5.5.6.5. Modificare l'intervallo di refresh della configurazione
Comando:
agent agent1
    update-minperiod 120
exit
5.5.7. Livelli priorita
5.5.7.1. Creare
Comando:
priority <name> <min> <max> [ description ]
Esempio:
priority-level low 1 30 Priorita' bassa
5.5.8. Event (log) Reason
5.5.8.1. Creare
Comando:
log-reason <code>
        description foo
        color ff0000
exit
Esempio:
log-reason  unplanned-activity
exit
5.5.8.2. Rimuovere
Comando:
no log-reason <code> <code>
Esempio:
no log-reason unplanned-activity unplanned-activity
5.5.9. Datagroup Template
La gestione dei template e' analoga a quella di Sanet2 pur con alcune differenze sintattiche nei comandi.
I datagroup template possono essere definiti globalmente a livello di library sia localmente per un singolo tenant.
La modalita' di definizione di un template e' la stessa in entrambi i casi, pur con alcune differenze sintattiche.
5.5.9.1. Datagroup Template
Creare un datagroup template:
datagroup-template  <name>

        description        <descrizione opzionale>

        source
        parent
        title              <stringa col titolo>
        dependson          <stringa col path della condition>
        minperiod          <numero>
        shorttries         <numero>
        timeout            <numero - timeout di default>
        classification     Logical classification

exit
5.5.9.1.1. Owner
Per specificare l'owner di un datagroup-template bisogna usare il comando
datagroup-template <name>
    owner <username>
exit
5.5.9.1.2. Gruppi e permessi
Per aggiungere/togliere i permessi di un gruppo sul template bisogna utilizzare il comando group:
datagroup-template <name>
    group <gruop> [ read-only | read-write ]

    no group <group>
exit
5.5.9.1.3. Parametri opzionali
Aggiungere un parametro opzionale ad un datagroup-template:
datagroup foo
        parameter <name> <type> <value>
exit
Esempio:
datagroup foo
        parameter threshold num 85
exit
Per rimuovere un parametro:
datagroup foo
        no parameter <name> <name>
exit
5.5.9.1.4. Datasource
Aggiungere:
datagroup foo
        datasource <name>
                ...
        exit
exit
Rimuovere:
datagroup foo
        no datasource <name> <name>
exit
Configurare gli attributi di un datasource:
datasource <name>
        title              <stringa>            Descriptive title

        classification     <stringa>            Logical classification
        expr               <stringa>            Expression
        gauge              true | false         Treat expression value as a "gauge" value.
        max-val            <numero>             Maximum valid value
        min-val            <numero>             Minimum valid value
        cascade            true | false         On error do not check the following datasources

        order              <numero>             Computation order when checking datagroup

        save-value         true | false         Store serie value inside DB

        deleted            true | false         Set to "true" to ignore this datasource
exit
Per rimuovere la configurazione di un attributo:
datasource <name>
        no title
        no expr
        no order
        no save-value
        no min-val
        no max-val
        no gauge
        no cascade
        no classification
        no storage-spec
        no deleted
exit
5.5.9.1.5. Condition
Aggiungere:
datagroup foo
        condition <name>
        ...
        exit
exit
Rimuovere:
datagroup foo
        no condition <name> <name>
exit
Configurare gli attributi di una condition:
condition <name>
        title                   <stringa>                  Descriptive title
        primary                 true | false               Sets the element' primary condition
        priority                <numero>                   Set priority
        expr                    <stringa>                  Expression
        max-tries               <numero>                   Max number of checks before DOWN state.
        uncheckable-fallback    UP o DN                    Forced state when the expression is uncheckable
        classification          <stringa>                  Logical classification
        dependson               <stringa>                  Path of the condition this condition depends on
        deleted                 true | false               Set to "true" to ignore this condition
        email                   <stringa>                  Default recipient for DOWN (and UP) notifications
        upemail                 <stringa>                  Force recipient for UP notifications
        msg-downbody            <stringa>                  Message for DOWN notifications
        msg-downsubj            <stringa>                  Subject for DOWN notifications
        msg-upbody              <stringa>                  Message for UP notifications
        msg-upsubj              <stringa>                  Subject for UP notifications
exit
Per rimuovere la configurazione di un attributo:
condition <name>
        no title
        no primary
        no priority
        no expr
        no max-tries
        no uncheckable-fallback
        no classification
        no dependson
        no deleted
        no email
        no upemail
        no msg-downbody
        no msg-downsubj
        no msg-upbody
        no msg-upsubj
exit
5.5.9.1.6. Trend
Aggiungere:
datagroup foo
        trend <name>
                ...
        exit
exit
Rimuovere:
datagroup foo
        no trend <name> <name>
exit
Configurare gli attributi di un trend:
trend <name>
        deleted                 true | false               Set to "true" to ignore this condition
        ds                      <stringa>                  Datasource for calculating trend (Sintax {<ds_name>@})
        label                   <stringa>                  Short description of the trend
        max-value               <stringa>                  Expression representing the upper threshold
        min-value               <stringa>                  Expression representing the lower threshold
        steps-back              <numero>                   Number of data values for calculationg trends
        steps-tolerance         <numero>                   Percentace of non-null data values for calculationg trends
exit
Per rimuovere la configurazione di un attributo:
trend <name>
        no deleted
        no ds
        no max-value
        no expr
        no steps-back
        no steps-tolerance
exit
5.5.9.1.7. Timegraph
Aggiungere:
datagroup foo
        timegraph <name>
                ...
        exit
exit
Rimuovere:
datagroup foo
        no timegraph <name> <name>
exit
Modificare l'attributo di un timegraph:
timegraph <name>
        classification   <stringa>      Logic classification
        deleted          true | false   Set to "true" to ignore this timegraph
        primary          true | false   Set element's primary timegraph
        stacked          true | false   Timegraph's series can be stacked.
        title            <stringa>      Descriptive title
        ylegend          <stringa>      Y-axis legend
exit
Per rimuovere la configurazione di un attributo:
timegraph <name>
        no classification
        no deleted
        no primary
        no stacked
        no title
        no ylegend
exit
Per aggiungere una serie:
datagroup <name>
        ...
        timegraph <name>
                ...
                serie <name>
                        ...
                exit
                ...
        exit
        ...
exit
Per rimuovere una serie:
datagroup <name>
        timegraph <name>
                no serie <name> <name>
        exit
exit
Modificare l'attributo di una serie:
datagroup <name>
        timegraph <name>
                serie <name>
                        color            <stringa>    RGB Color (#rrggbb)
                        computed-value   <stringa>    Value's expression
                        deleted          true|false   Disable this serie
                        legend           <stringa>    Legend of the serie
                        render-order     <numero>     Rendering order inside the graph
                        style            <stile>      Rendering style (line, area, ecc.)
                        var-value        <stringa>    Name of the datasource related to this serie
                exit
        exit
exit
Stile di una serie:
invisible Invisible
line Line style
tick Tick style
area Area style
Per rimuovere la configurazione di un attributo:
datagroup <name>
        timegraph <name>
                serie <name>
                        no color
                        no computed-value
                        no deleted
                        no legend
                        no render-order
                        no style
                        no var-value
                exit
        exit
exit
5.5.9.1.8. Gerarchia e parent template
Per estendere un datagroup da uno gia' esistente e creare una gerarchia di template bisogna usare il comando parent
datagorup  dg_parent
        datasource ds1
        exit
        condition c1
        exit
exit

datagroup dg_child
        ...
        parent dg_parent
        ...
        datasource ds2
        exit
        ...
exit
Se il template che si vuole estendere direttamente un datagroup definito nella library bisogna utilizzare il comando:
parent <nome> library
5.5.9.1.9. Flag deleted
Per impostare il flag deleted per un datagroup/datasource/condition bisogna entrare nel sezione di configurazione corrispondente:
datagorup  dg_parent
        ...
        datasource ds1
                ...
        exit
        ...
        condition c1
                ...
        exit
exit

datagroup dg_child
        ...
        parent dg_parent
        ...
        datasource ds1
                deleted true
        exit
        ...
exit
5.5.10. Cluster
Per definire un cluster:
cluster <name>
   ...
exit
Esempio:
cluster controllers
  description Cluster dei wireless controller
exit
Per rimuovere un cluster:
no cluster <name> <name>
Esempio:
no cluster controllers controllers
5.5.11. Elementi del monitoraggio
All'interno di un singolo tenant possono essere definiti elementi di monitoraggio
5.5.11.1. Nodi
Per aggiungere un nuovo nodo:
node <name>
        ...
exit
All'internod i un nodo e' possibile creare altri tipi di sotto elementi:
interface
storage
device
service
5.5.11.1.1. Nodi in cluster
Per modificare i dati di associazione ad un cluster (cluster-xform, cluster-distinguisher, ecc..) si usano i comandi omonimi:
node foo
  ...
  cluster-role master|dependent
  cluster-xform .....
  cluster-distinguisher ....
  cluster-instance ....
  ...
exit
5.5.11.2. Interfacce
Per definire un'interfaccia:
interface <name> [ distinguisher <val>  [ xform <expressione> ] ]
        ...
exit
Oppure:
interface <name>
 ...
 distinguisher <val>
 xform <expressione>
 ...
exit
Per retrocompatibilita' il parametro "distinguisher" e' sostituibile nei comandi con il comando "instance".
interface <name> [ distinguisher <val>  [ xform <expressione> ] ]
        ...
exit
5.5.11.2.1. xform e "ifdescr"
In fase di definizione di una interfaccia e' possibile usare come xform la keyword "ifdescr".
Questa keyword viene automaticamente espansa nell'espressione:
byRegexpUnique(1.3.6.1.2.1.2.2.1.2@, '^'+$distinguisher+'$')
Example:
interface eth0 distinguisher eth0 xform ifdescr
        ...
exit
5.5.11.3. Storage
Definire uno storage:
storage <name> [ distinguisher <val>  [ xform <expressione> ] ]
        ...
exit
Oppure, in alternativa:
storage <name>
        ...
        distinguisher  <val>
        xform          <expressione>
        ...
exit
5.5.11.3.1. xform e storagedescr
In fase di definizione di uno storage e' possibile usare come xform la keyword "storagedescr".
Questa keyword viene automaticamente espansa nell'espressione:
byRegexpUnique(1.3.6.1.2.1.25.2.3.1.3@, '^'+$distinguisher)
Esempio:
storage root_partition distinguisher / xform storagedescr
        ...
exit
5.5.11.4. Service
Definire un servizio:
service <name> [ distinguisher <val>  [ xform <expressione> ] ]
        ...
exit
Oppure:
service <name>
        ...
        distinguisher  <val>
        xform          <expressione>
        ...
exit
5.5.11.4.1. xform e "procdescr"
In fase di definizione di un service e' possibile usare come xform la keyword "procdescr" :
byRegexpUnique(1.3.6.1.2.1.25.4.2.1.2@, '^'+$distinguisher+'$')
Esempio:
service oracle instance "oracle.exe" xform procdescr
        ....
exit
5.5.11.4.2. xform e "procdescrargs"
A volte e' necessario "riconoscere" un processo anche in base ai parametri con cui viene eseguito. E' possibile usare come xform la keyword "procdescrargs" per gestire questo caso.
byMultiRegexpUnique( 1.3.6.1.2.1.25.4.2.1@ , "4", "s/"+strsplit($distinguisher," ")[0], "5", "s/"+strsplit($distinguisher, " ",1)[1] )
Quando viene usata questa keyword il sistema si aspetta che l'attributo <distinguisher> contenga una stringa divisa in due sottostringhe separate da spazi.
Esempio:
service oracle instance "oracle.exe -p1 prova -p2 10" xform procdescrargs
        ...
exit
La xform cerchera' l'istanza facendo match su "oracle.exe" e "-p1 prova -p2 10".
5.5.11.5. Device
Definire un device:
device <name> [ distinguisher <val>  [ xform <expressione> ] ]
        ...
exit
Oppure:
device <name>
        ...
        distinguisher  <val>
        xform          <expressione>
        ...
exit
5.5.11.5.1. xform e "devindex"
Non esiste un analgo a "ifdescr" o "storagedescr" per i device. Eventuali wildcard possono essere aggiunte in futuro.
5.5.11.6. Link
Per definire un link tra interfacce bisogna dare il seguente comando
link <node1> <iface1> <node2> <iface2> [ name <name> ] [ type <type> ] [ description <description> ] [ override ]
Attention
La seguente sintassi e' VECCHIA e DEPRECATA: .. code-block:: CLI
link <node1> <iface1> <node2> <iface2> [ <name> [ <type> [ <description> ] ] ]
Il nome del link deve essere univoco.
Il tipo puo' essere:
physical
network
virtual
Important
Se si cerca di creare un nuovo link tra due interfacce di tipo "physical" gia' coinvolte in altri link "physical", il comando dara' errore. Attraverso il parametro "override" viene forzata la creazione del nuovo link, rimuovendo il link che crea il conflitto.
Esempio:
link labs-sw2524-1 p26 labs-sw2524-2 p26 name link1 type physical description "Da interfaccia labs1:p26 a interfaccia labs2:p26"

link labs-sw2524-1 p26 labs-sw2524-2 p27           # ERRORE: esiste gia' il link "physical" chiamato "link1"

link labs-sw2524-1 p26 labs-sw2524-2 p27 override  # OK: link "link1" rimosso.
5.5.12. Datagroup diretti
Per creare datagroup diretti per un determinato elemento di monitoraggio bisogna specificare il datagroup all'interno della sezione di configurazione di quell'elemento:
node  localhost
        ...
        datagroup icmp-reachability
           ...
        exit
        ...
        datagroup icmp2 template icmp-reachability
           ...
        exit
        ...
exit
5.5.12.1. Rinominare datagroup diretti
E' possibile rinomiare datagroup diretti usando il comando "rename":
rename datagroup <name> <new name> [ fix-logs | no-fix-logs ]
Esempio:
node localhost

    datagroup icmp-reachability                      # create
    exit

    rename datagroup icmp-reachability primary-dg    # rename

exit
Il parametro fix-logs serve per specificare se path del datagrop rinominato deve essere opportunamente aggiornato anche nei log degli eventi di Sanet. Di default il comando viene eseguito come se fosse stato specificato il parametro no-fix-logs.
Warning
Poiche' Sanet conserva i log anche per molto tempo (la retention di default e' 1 anno), il numero di log da aggiornre potrebbe essere molto elevato e costo complessivo dell'aggiornamento, in termini di tempo e cicli di CPU, potrebbe essere particolarmente elevato.
5.5.13. Element Template
Gli element template si configurano tutti nello stesso modo. Cambia il comando da dare per specificiare il tipo di elemento (nodo/interfaccia/ecc...) valido per quel template.
{tipo}-template <nome>
        ... elenco di datagroup ...
exit
Esempi:
node-template  server-linux
        ...
exit

interface-template  ethernet-base
        ...
exit

storage-template  storage-win
        ...
exit

service-template  apache-linux
        ...
exit

device-template fan-base
        ...
exit
5.5.13.1. Owner
Per specificare l'owner di un element-template bisogna usare il comando:
node|interface|storage|service|divece-template <name>

        owner <username>

exit
5.5.13.2. Gruppi e permessi
Per aggiungere/togliere i permessi di un gruppo sul template bisogna utilizzare il comando group:
node|interface|storage|service|divece-template <name>

        group <gruop> [ read-only | read-write ]

        no group <group>

exit
5.5.13.3. Node Template
Definire un node template:
node-template <name>
  ... elenco di datagroup ...
exit
Esempio:
storage-template disk

        datagroup disk-space
        exit

        datagroup performance-data
        exit

exit
5.5.13.3.1. Flag aggiuntivi (switch e router)
Per i node-template e' possibile specificare anche i due flag che servono per valorizzare il corrispondente attributo associato al nodo a cui verra' applicato il template.
switch
router
Esempio:
node-template
    switch
    router
    ...
    ...
exit
5.5.13.3.2. Dichiarare sotto-entita' all'interno di un node-template
Specificare una interfaccia:
node-template ...
    interface <name>  [ distinguisher <distinguisher> [ xform <xform> ] ]

       [ distinguisher <distinguisher> ]
       [ xform <xform> ]

       [ template <template> ]

       [ ... ]
    exit
exit
Specificare uno storage:
node-template ...
    storage  <name>  [ distinguisher <distinguisher> [ xform <xform> ] ]

       [ distinguisher <distinguisher> ]
       [ xform <xform> ]

       [ template <template> ]

       [ ... ]
    exit
exit
Specificare un service:
node-template ...
    service <name>  [ distinguisher <distinguisher> [ xform <xform> ] ]

       [ distinguisher <distinguisher> ]
       [ xform <xform> ]

       [ template <template> ]

       [ ... ]
    exit
exit
Specificare un device:
node-template ...
    device <name> [ distinguisher <distinguisher> [ xform <xform> ] ]

       [ distinguisher <distinguisher> ]
       [ xform <xform> ]

       [ template <template> ]

       [ ... ]
    exit
exit
Esempio:
node-template server-linux
    ...
    interface eth0   distinguisher eth0   xform  ifdescr
        template interface-base
    exit
    ...
exit
5.5.13.3.3. Modificare paramtri delle sotto-entita di un node-template
E' possibile modificare i parametri delle sotto entita definite in un node-template:
distinguisher
xform
E' possibile:
modificare il valore esistente
cancellare il valore esistente (impostarlo a null)
Warning
quando vengono modificati gli attributi di un sub-elemente tempalte ed esistono gia' degli elementi di monitoraggio creati automaticamente sulla base del template, gli elementi monitorati vengono aggiornati solo se non hanno sovrascritto i propri attributi "localmente" (dentro la configurazione del nodo).
Esempio:
node-template server-linux
    ...
    interface eth0   distinguisher eth0   xform  ifdescr

        distinguisher eth000000
        xform         $foo + 1

        no distinguisher
        no xform
    exit
    ...
exit
5.5.13.4. Interface Template
Definizione:
interface-template <name>
    ...
    ... elenco datagorup template ...
    ...
exit
5.5.13.5. Storage Template
Definizione:
storage-template <name>
    ...
    ... elenco datagorup template ...
    ...
exit
5.5.13.6. Service Template
Definizione:
service-template <name>
    ...
    ... elenco datagorup template ...
    ...
exit
5.5.13.7. Device Template
Definizione:
device-template <name>
    ...
    ... elenco datagorup template ...
    ...
exit
5.5.13.8. Aggiungere datagroup ad un element template
L'aggiunta di un datagroup ad un template avviene indicando il nome del datagroup-template corrispondente con il seguente comando:
datagroup <datagorup-template-name>
   ...
exit
Esempio:
node-template server-linux
    datagroup reachability
       ... personalizzazioni del datagorup ...
    exit
exit
Per associare un datagroup-template utilizzando un nome diverso:
datagroup <instance-name> template <template-name>
    ...
exit
Esempio:
node-template server-linux

    datagroup icmp-reachability                                 NORMALE
    exit

    datagroup reachability2 template icmp-reachability          CON NOME DIVERSO
    exit

exit
5.5.13.9. Personalizzare un datagroup all'interno di un element template
E' possibile modificare i campi di un datagroup-template in un elemente-template quando direttamente all'interno della definizione del datagroup-template.
node-template server-linux

    datagroup icmp-reachability
        ...
        min-period 666
        ...
    exit

exit
5.5.13.10. Applicare uno o piu' element template ad un elemento
Entrare nella configurazione dell'elemento e usare il comando 'template'.
Esempio:
node localhost
    ...
    template <element-template 1>
    template <element-template 2>
    template <element-template 3>
    ...
    service mysql
        ...
        template <element-templat 4>
        template <element-templat 5>
        template <element-templat 6>
        ...
    exit
exit
Per rimuovere il riferimento ad un template bisogna usare il comando no.
Esempio:
node localhost
    template server-linux
    template server-web

    no template server-linux      <----- toglie il rifermento
exit
E' possibile inoltre forzare la sostituzione dei template associati ad un nodo con un template specificato utilizzando il comando:
node <nodo>
    replace-all-template-with  <elem-template>
exit
Dove <nodo> e' il nodo di cui si vuole modificare la configurazione ed <elem-template> il template con cui vogliamo fare la sostituzione dei template precedentemente configurati.
Esempio
Data la configurazione:
node localhost
    ...

    template server-linux
    template server-web
    ...

exit
Il comando:
node localhost
        replace-all-template-with  server-base
exit
Avra' come risultato la seguente configurazione per il nodo localhost:
node localhost
    ...

    template server-base

    ...

exit
Vengono eliminati i riferimenti a template server-linux e template server-web e viene inserito il riferimento a template server-base.
5.5.13.11. Personalizzare datagroup di un element-template per ogni elemento
Per poter cambiare le perametrizzazioni di un datagroup ereditato da un particolare template bisogna usare il comando template-datagroup:
Esempio:
node-template server-linux
    ...
    datagroup icmp template icmp-reachability
    exit
    ...
exit

node localhost
    ...
    template server-linux
    ...
    template-datagroup icmp
        ...
        min-period 666
        ...
        condition reach
            ...
            priority 55
            ...
        exit
        ...
    exit
    ...
exit
In presenza di un conflitto di nomi di datagroup con lo stesso nome da element template diversi, e' possibile disambiguare il datagroup che si vuole customizzare usando la keyword from.
Esempio:
node-template server-linux-1
    ...
    datagroup main-check template icmp-reachability        <-- il nome  "main-check" e' locale, ma e'  usato anche in altri node-template
    exit
    ...
exit


node-template server-linux-2
    ...
    datagroup main-check template icmp-reachability        <-- il nome  "main-check" e' locale, ma e'  usato anche in altri node-template
    exit
    ...
exit

node localhost
    ...
    template server-linux-1
    template server-linux-2
    ...
    template-datagroup main-check from server-linux-2      <-- disambiguare il riferimento
        ...
        min-period 666
        ...
    exit
    ...
exit
5.5.13.12. Gestione sotto-entita' all'internod i un node-template
5.5.13.12.1. Dichiarare sotto-entita'
All'interno di un node-template e' possibile dichiare sotto-element (in gergo sub-element template):
Specificare una interfaccia:
interface <name>  [ distinguisher <distinguisher> [ xform <xform> ] ]
   [ template <template> ]
   [ ... ]
exit
Specificare uno storage:
storage  <name>  [ distinguisher <distinguisher> [ xform <xform> ] ]
   [ template <template> ]
   [ ... ]
exit
Specificare un service:
service <name>  [ distinguisher <distinguisher> [ xform <xform> ] ]
   [ template <template> ]
   [ ... ]
exit
Specificare un device:
device <name> [ distinguisher <distinguisher> [ xform <xform> ] ]
   [ template <template> ]
   [ ... ]
exit
Esempio:
node-template server-linux
    ...
    interface eth0   distinguisher eth0   xform  ifdescr
        template interface-base
        template interface-stp
        template interface-other
    exit
    ...
exit
5.5.13.12.2. Personalizzare datagroup per sub-elementi generati da un sub-element template
Per personalizzare un elemento generato da un sub-element template bisogna entrare nella sua sezione di configurazione.
Per farlo bisogna usare un comando leggermente diverso dai normali comandi interface, storage, ecc...
template-interface  <nome>
    ...
exit

template-storage  <nome>
    ...
exit

template-service  <nome>
    ...
exit

template-device  <nome>
    ...
exit
Esempio:
interface-template iface-base
    datagroup iface-status
       ...
    exit
exit

node-template server-base
    interface eth0
        template iface-base
    exit
exit

node localhost

    template server-base

    interface xxx                         <---- Interfaccia NON generata dal template *server-base*
    exit

    template-interface eth0               <---- entro nella sezione di configurazione dell'interfaccia eth0 definita in *server-base*

        template-datagroup iface-status   <---- entro nella sezione di configurazione del datagroup
           ... personalizzazioni ...      <---- personalizzazioni
        exit

    exit
exit
5.5.13.12.3. Applicare o rimuove element template aggiuntivi un elemento generato da un sub-element-template
Se un sotto-elmento (una interfaccia) e' stata generata a partire da un sub-element template non e' possibile specificare/rimuovere element-template specificati nella definizione del sub-element template.
E' possibile aggiungere altri template a quelli gia' applicati entrano nella configurazione del sotto-elemento.
Esempio:
interface-template iface-base
    ...
exit

interface-template iface-stp
    ...
exit


node-template server-base
    interface eth0
        template iface-base
    exit
exit

node localhost

    template server-base

    template-interface eth0

        template iface-base      <---- NO

        no template iface-base   <---- NO

        template iface-stp       <---- SI aggiunta

        no template iface-stp    <---- SI rimozione
    exit
exit
5.5.14. Suspend e resume di datagroup
E' possibile sospendere l'esecuzione dei datagroup attraverso il comando "suspend".
suspend datagroup <PATH> for <NUM>
suspend datagroup <PATH> for <NUM> <COMMENT>
suspend datagroup <PATH> forever
suspend datagroup <PATH> forever <LINE COMMENT>
suspend datagroup <PATH> until <YYYY-MM-DD HH:MM:SS>
suspend datagroup <PATH> until <YYYY-MM-DD HH:MM:SS> <LINE COMMENT>
Esempio:
suspend datagroup path localhost;;icmp-reachability until "2038-01-01 00:00:00" "Sospeso praticamente sempre"
Analogamente e' possibile sospendere tutti i datagroup di un elemento con:
suspend node <NODE> for <NUM>
suspend node <NODE> for <NUM> <COMMENT>
suspend node <NODE> forever
suspend node <NODE> forever <LINE COMMENT>
suspend node <NODE> until <YYYY-MM-DD HH:MM:SS>
suspend node <NODE> until <YYYY-MM-DD HH:MM:SS> <LINE COMMENT>

suspend interface <NODE> <IFACE> for <NUM>
suspend interface <NODE> <IFACE> for <NUM> <COMMENT>
suspend interface <NODE> <IFACE> forever
suspend interface <NODE> <IFACE> forever <LINE COMMENT>
suspend interface <NODE> <IFACE> until <YYYY-MM-DD HH:MM:SS>
suspend interface <NODE> <IFACE> until <YYYY-MM-DD HH:MM:SS> <LINE COMMENT>

suspend storage <NODE> <STORAGE> for <NUM>
suspend storage <NODE> <STORAGE> for <NUM> <COMMENT>
suspend storage <NODE> <STORAGE> forever
suspend storage <NODE> <STORAGE> forever <LINE COMMENT>
suspend storage <NODE> <STORAGE> until <YYYY-MM-DD HH:MM:SS>
suspend storage <NODE> <STORAGE> until <YYYY-MM-DD HH:MM:SS> <LINE COMMENT>

suspend service <NODE> <SERVICE> for <NUM>
suspend service <NODE> <SERVICE> for <NUM> <COMMENT>
suspend service <NODE> <SERVICE> forever
suspend service <NODE> <SERVICE> forever <LINE COMMENT>
suspend service <NODE> <SERVICE> until <YYYY-MM-DD HH:MM:SS>
suspend service <NODE> <SERVICE> until <YYYY-MM-DD HH:MM:SS> <LINE COMMENT>

suspend device <NODE> <DEVICE> for <NUM>
suspend device <NODE> <DEVICE> for <NUM> <COMMENT>
suspend device <NODE> <DEVICE> forever
suspend device <NODE> <DEVICE> forever <LINE COMMENT>
suspend device <NODE> <DEVICE> until <YYYY-MM-DD HH:MM:SS>
suspend device <NODE> <DEVICE> until <YYYY-MM-DD HH:MM:SS> <LINE COMMENT>
Per riattivare un controllo bisogna usare il comando "resume":
resume datagroup <PATH>
resume datagroup <PATH> <LINE>

resume node <NODE>
resume node <NODE> <LINE>

resume interface <NODE> <IFACE>
resume interface <NODE> <IFACE> <LINE COMMENT>

resume storage <NODE> <STORAGE>
resume storage <NODE> <STORAGE> <LINE COMMENT>

resume service <NODE> <SERVICE>
resume service <NODE> <SERVICE> <LINE COMMENT>

resume device <NODE> <DEVICE>
resume device <NODE> <DEVICE> <LINE COMMENT>
5.5.15. Refresh
Per "aggiornare" la configurazione di un nodo o di un datagroup o di un template e' possibile usare i comandi:
refresh node <node>
refresh datagroup <datagroup path>
refresh datagroup-template <datagroup template>
5.5.16. Scheduling Group
5.5.16.1. Configurazione agente
agent <name>
    ...
    scheduling-min-gap      <n>
    scheduling-max-parallel <n>
    scheduling-max-deadline <n>
    ...
exit
5.5.16.2. Configurazione di un cluster
cluster <name>
    ...
    scheduling-min-gap      <n>
    scheduling-max-parallel <n>
    scheduling-max-deadline <n>
    ...
exit
5.5.16.3. Configurazione di un elemento di monitoraggio
node <name>
    ...
    scheduling-min-gap      <n>
    scheduling-max-parallel <n>
    scheduling-max-deadline <n>
    ...
exit
interface <name> ... scheduling-min-gap <n> scheduling-max-parallel <n> scheduling-max-deadline <n> ... exitstorage <name> ... scheduling-min-gap <n> scheduling-max-parallel <n> scheduling-max-deadline <n> ... exitservice <name> ... scheduling-min-gap <n> scheduling-max-parallel <n> scheduling-max-deadline <n> ... exitdevice <name> ... scheduling-min-gap <n> scheduling-max-parallel <n> scheduling-max-deadline <n> ... exit
5.5.16.4. Configurazione di uno scheduling group
scheduling-group <name>

    min-gap      <n>
    max-parallel <n>
    max-deadline <n>

exit
5.5.16.4.1. Assegnamento di un elemento
node <name>
    ...
    scheduling-group <name>
    ...
exit
interface <name> ... scheduling-group <name> ... exitstorage <name> ... scheduling-group <name> ... exitservice <name> ... scheduling-group <name> ... exitdevice <name> ... scheduling-group <name> ... exit
5.5.16.4.2. Assegnamento di un datagroup
node <name>
    ...
    datagroup <name>
        ...
        scheduling-group <name>
        ...
    exit
    ...
    template-datagroup <name>
        ...
        scheduling-group <name>
        ...
    exit
    ...
exit
5.5.17. Configurazione Library
Per configurare la library bisogna entrare in nella sotto-modalita' di configurazione "library" con il comando omonimo:
library
5.5.17.1. Shortcut CLI
Il comandi:
$ sanet-cliconfiguration library
possono essere abbreviati in
$ sanet-cliconfiguration library
5.5.17.2. Shortcut da Shell
E' possibile entrare direttamente in modalita' library da shell col comando:
sanet-cli -c -l
5.5.17.2.1. File coi Datagroup Template della libray
La "library" e' un insieme di file che contengono set di datagroup-template gia' pronti.
Questi file sono contenuti nella directory:
{{SANET_INSTALL_DIR}}/share/library/
5.5.17.2.2. Importare la library da shell
Per (re)importare definizioni di datagroup template nella library e' necessario importare file di configurazione dalla directory dell "library" direttamente dentro la CLI.
cat <file> | sanet-cli -c -l
Note
non e' consigliabile (re)importare tutti i file della library con un unico comando. E' preferibile (re)importare solo i file che contengono template di cui si vuole aggiornare la configurazione sul database.
5.5.18. Modalita' speciali
5.5.18.1. Gestione delle errori/eccezioni (-X)
Utilizzando l'opzione -X a riga di comando si puo' indicare alla CLI di interrompere immediatamente il processo non appena viene riscontrato un qualunque tipo di errore.
sanet-cli -X
Note
questa opzione e' comoda quando si vuole importare una configurazione da standard input.
Quando la CLI viene eseguita in questa modalita' e' possibile usare il comando:
set errors disable
Per disabilitare momentamentamente questa modalita'
Per ripristinare la modalita' -X bisogna utilizzare il comando:
set errors default
Esempio:
$ sanet-cli -X -c -Tset errors ignore WARNING: Errors disabled (exit on error was: True) show node name xxx ERROR: Unrecognized command after show node name: xxx set errors default WARNING: Errors reset to default (exit on error=True) show node name xxx FATAL ERROR:Unrecognized command after show node name: xxx *EXIT*
5.6. Comandi di utility
5.6.1. test datagroup
La sintassi e':
test datagroup <path> [ verbose < full | normal > ]
Note
questo comandi di CLI e' equivalente al comandi di shell exec_datagroup.
Esempi:
test datagroup path localhost;;icmpreachabilitytest datagroup path localhost;;icmpreachability verbose full
5.6.2. test expression
La sintassi e':
test expression <elementpath> <expression>
Note
questo comandi di CLI e' equivalente al comandi di shell exec_expr.
Esempi:
test expression localhost 1.3.6.1.2.1.1.1.0test expression localhost:eth0 $ifindex